
I love glitter and anything that sparkles.
I also love arts n' crafts.
Give me some glue, scraps of paper, and Popsicle sticks and I'm one happy camper.
Anything DIY? Yes please.
I've also recently fallen in love with Pinterest.
Have you not heard of Pinterest!? It's a virtual pinboard that lets your organize and share all the beautiful things your find on the web (stuff like recipes, articles, blog posts, DIY projects, clothing, inspirational design ideas, party themes and decorations, etc.)
It rocks.
Can you imagine my joy when I found not just one, or two, but THREE darling glitter crafts on Pinterest!?!
Oh boy. JoAnns? Michaels? Are you ready for me?
3. Christmas Wreath (Don't worry, there is definitely glitter involved.)
Obviously I couldn't choose just one. I mean honestly, you need basically the same materials for all three crafts. And it hardly makes sense to clear off a huge table and whip out newspaper for one tiny craft. Ya know?
Plus we use clothespins all the time in our house - they're the most perfect chip/snack/cereal clips ever.
And who doesn't need glitter magnets?
Do you every justify stuff in your head like that?
It happens to me all the time.
And so, I've got three glittery projects to share with you. The third one (the Christmas Wreath) is going to be a separate post because it requires glittery clothespins...and well...we've got to make them first!
The Materials:
The Materials:
- A pack of ceramic magnets
- A pack of clothespins
- Glitter in your choice of color (coarser glitter is better than anything super-fine)
- Glue
- Mod Podge
- Paint brush
- Newspaper
- Muffin tins
- A metal pan/cookie sheet
- A pack of clothespins
- Glitter in your choice of color (coarser glitter is better than anything super-fine)
- Glue
- Mod Podge
- Paint brush
- Newspaper
- Muffin tins
- A metal pan/cookie sheet

At first I laughed when I read I needed a metal pan.
But trust me, you want it.
Magnets...they stick to each other, you know? It's not such a problem at first...but imagine what will happen if you cover a magnet in glue and they do their magnetic thing...
You get the point.
(Disclaimer: yes, the bottom of my baking pan has scratches. I have no idea how they got there!)


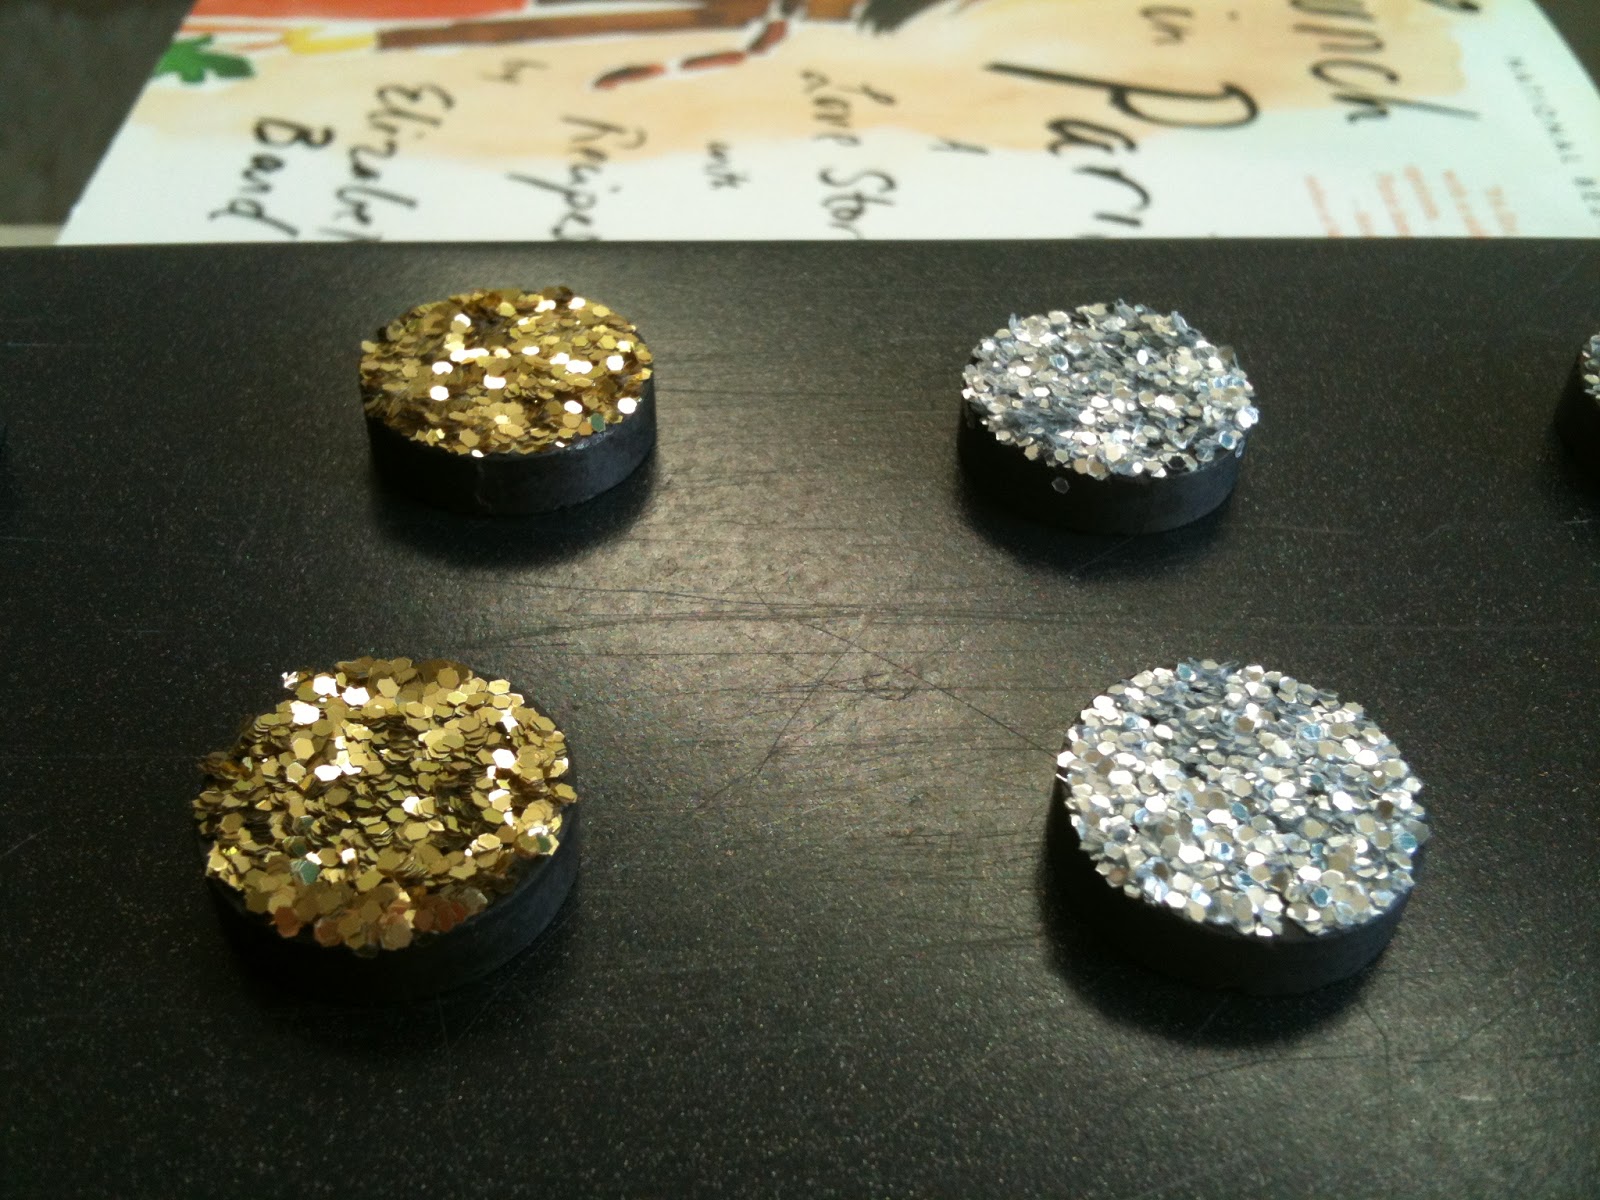
First, cover your magnet with glue and then place it in the glitter.

Wooho! Sparkly magnet!

Set it on your pan to dry and then do the same thing to all the magnets.

Once all your magnets have been glittered, let them dry completely.


Do exactly the same thing for the clothespins: cover them with glue (using the tip of the glue container to spread it out) and then sprinkled the glitter on them.

So pretty.

I did a second batch of clothespins for my Wreath project. I spray-painted these pins white before glittering.


Once the glitter/glue has dried completely, cover each pin and magnet with Mod Podge. You don't have to do this step...but personally...as much as I love glitter...I don't want it all over our apartment. The Mod Podge seals in the glitter so it can't be scraped off. Genius.

The Mod Podge looks weird but will dry completely clear, no worries.

When applying the Mod Podge, try to paint it on smoothly and wipe off the edges of the magnets and pins.

The finished product?
Glittery.
Sparkly.
Wonderful.


Doesn't everything look better when it's closed with a glitter clothespin?


CUTE!!! I have been way too into glitter over here but still don't have enough :) These are going to the top of my to do list :)
ReplyDeleteHooray! Both projects turned out AWESOME! Should you want to make glittery photo bottle-cap magnets, I have a post on that too: http://www.thecreativesalad.com/2011/12/09/picture-bottle-cap-magnets/
ReplyDeleteThanks for the link to my site and happy crafting!
Cassie - you'll love making them :)
ReplyDeleteCarrie - thanks so much for the great idea!