Showing posts with label Recipe. Show all posts

Tuesday, June 9, 2015

Quinoa Recipes Galore

We tried two new quinoa recipes recently and they were both phenomenal!

First up: Grilled Corn and Quinoa Salad.
Oh man.
This is so summery.
And oh so good.

It takes a little bit of time to chop up all the veggies, but trust me, it's worth it. This could totally be a side dish but we had it as our main meal with a side of grilled zucchini. It makes wonderful lunch leftovers. The original recipe calls for 2 cups of quinoa, which is what we made, but it seemed like wayyy too much when it was done cooking so I took out 1 cooked cup and saved it to make quinoa pancakes the next day.


Grilled Corn and Quinoa Salad
(Adapted from this recipe)


Ingredients
5 ears of corn, grilled
1 bunch green onions, chopped
1.5-2 cups quinoa
1 pint cherry tomatoes, chopped
1 bunch cilantro, chopped
Juice of 3 limes 
2 tbsp olive oil
S&P to taste

Directions
Prep & grill the corn (we just toss ears in a ziplock bag with evoo and s&p). 
When done, cut the kernels off the cobs.

Cook the quinoa.

Chop yo veggies.

Toss all ingredients together and voila!

Next up: Quinoa Pancakes.

I might just be in love with these.
I had them for the first time a few weeks ago for brunch at one of my favorite restaurants, True Food Kitchen. I knew then and there that I had to try to make them myself.

Surprisingly enough, they are way easier than you'd think!


Quinoa Pancakes
(Adapted from this recipe)

Ingredients
1 cup cooked quinoa
3/4 cup all-purpose flour
2 tsp baking powder
1/2 tsp salt
1 large egg
1 egg white
1 tbsp EVOO
1/4 cup milk
2 tbsp maple syrup (the good kind)

Directions
In a medium bowl, mix quinoa, flour, baking powder, and salt. 

In a small bowl, whisk together egg, egg white, evoo, milk, and syrup.

Add egg mixture to flour mixture and stir.

Heat your griddle or pan.
Make pancakes the way you normally do.

Serve with butter, maple syrup, some fresh berries, and my personal favorite: a dollop of plain Greek yogurt. Yes, seriously. Try it! I was totally skeptical the first time I tried it but it gives the pancakes a light taste and just the perfect tang to compliment the maple syrup.

I'm hooked, yall. 

Friday, March 13, 2015

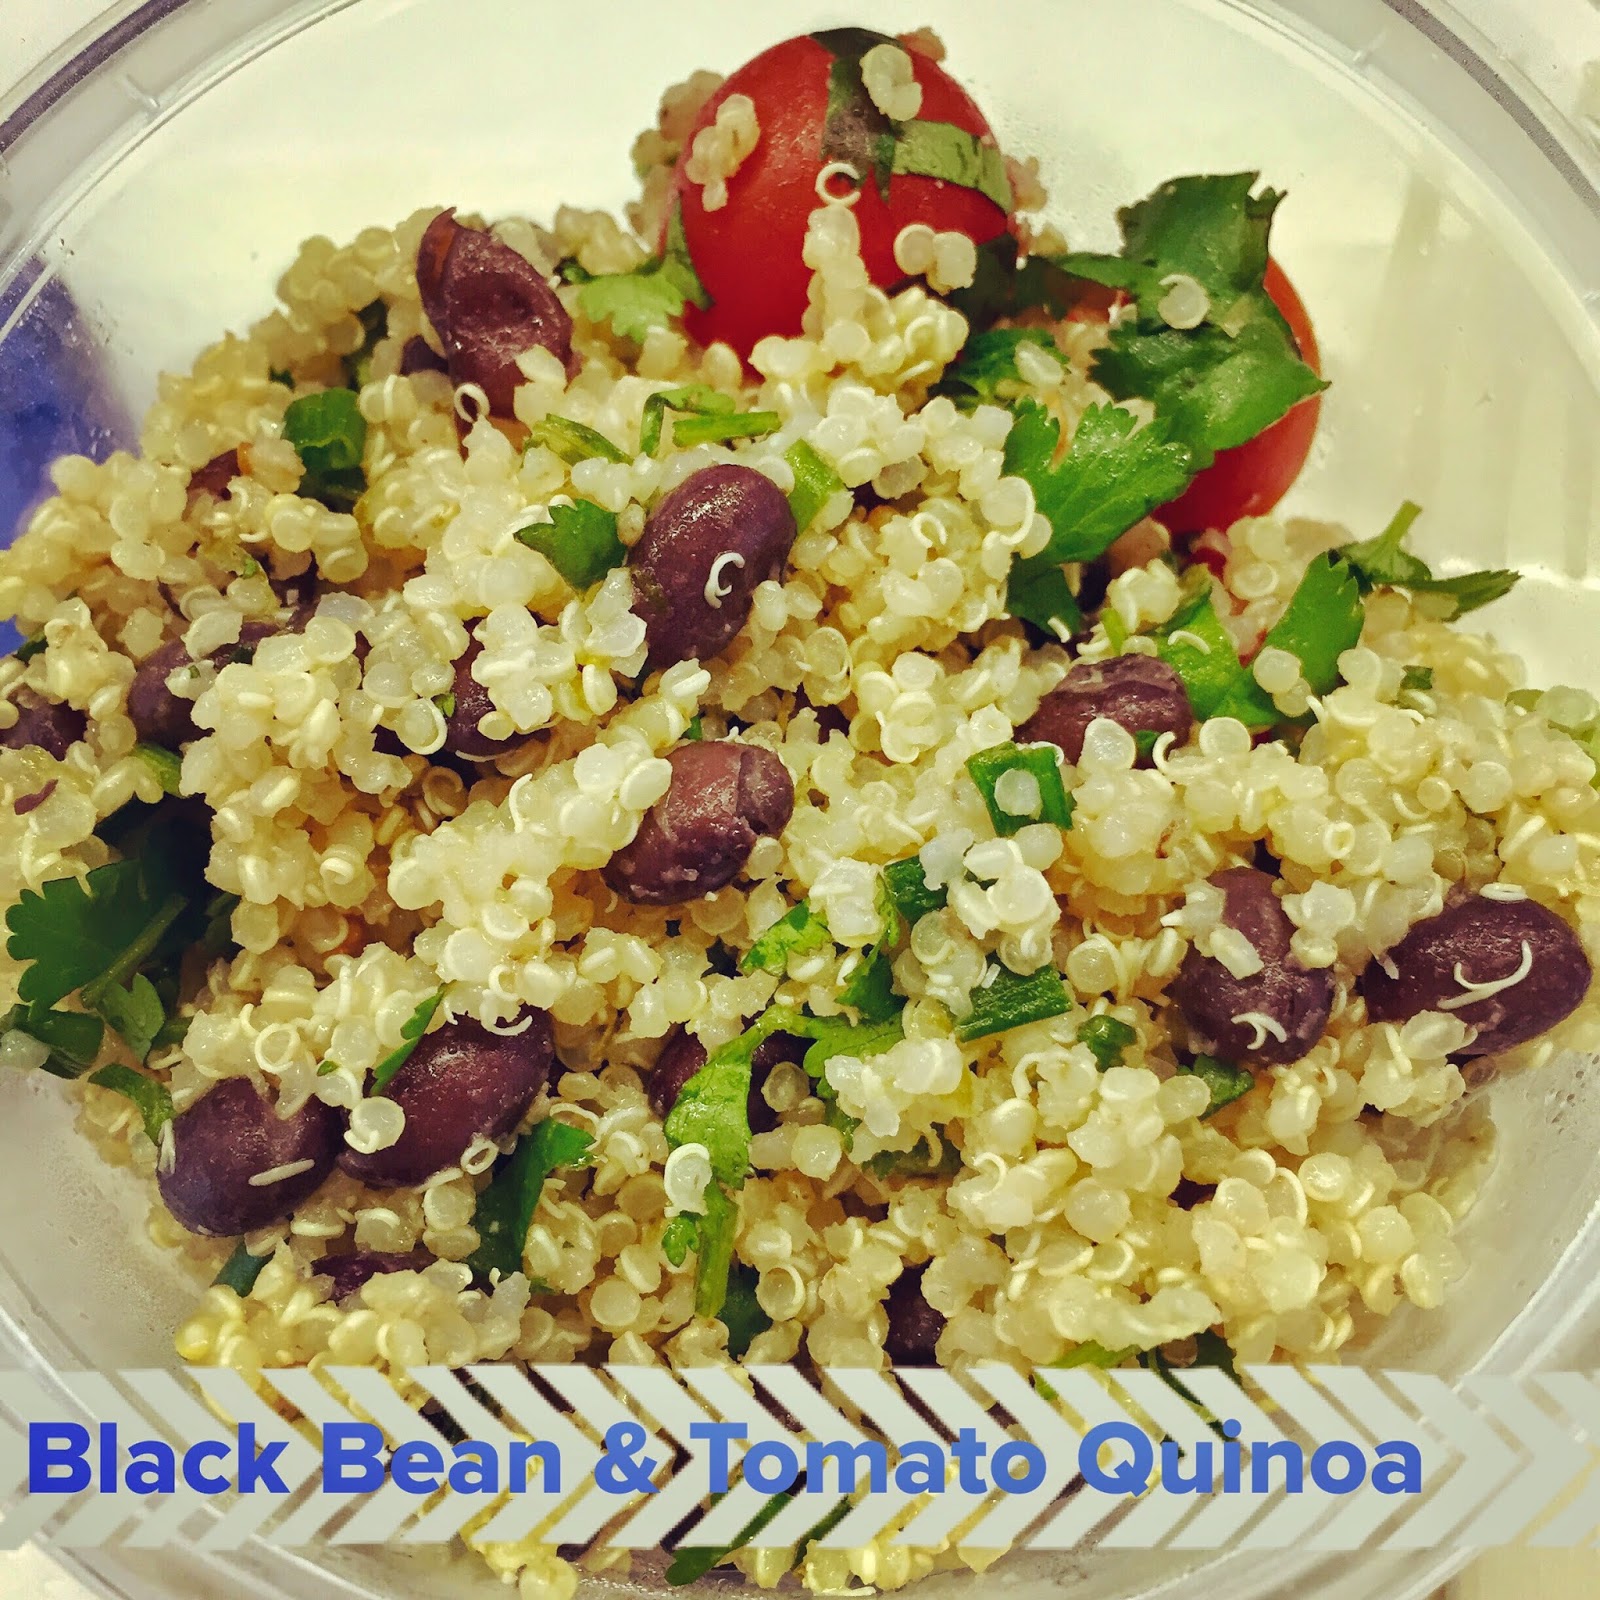
On The Menu: Black Bean & Tomato Quinoa

Black Bean & Tomato Quinoa | On the Menu | Joie de Vivre

I cannot get enough of this salad lately.
It's light, easy to make, and packed with filling protein.
Quinoa + black beans for the win!

Oh and did I mention that it practically doesn't have a scent? That's especially appealing to this pregnant person.

Over the past two months I learned that strong-smelling foods were my enemy. I'd get 15 minutes into preparing a meal and the smell would be so overwhelming that I couldn't finish cooking! Food and smell aversions are no joke, people. It actually became pretty comical by the middle of the first trimester: we'd meal plan at the beginning of the week and then realize by Thursday that all the meals had been total failures because I couldn't handle the smells.

So we turned to a lot of cold dishes. It was the only way to make sure that my sweet husband didn't end up eating cold cereal again for dinner. Or toast. We've been eating a lot of toast lately.

Anyway, we found this recipe about 4-5 years on Epicurious and absolutely love it. In the past, we typically made it as a side to this Fish Taco recipe - which is amazing - totally recommend it. Both recipes have cilantro & onion and just go so well together.

However, fish tacos have been out lately, for obvious smelly reasons. So we've been making this salad solo, or as a side to grilled (outside) chicken. And it always seems to make enough to have fabulous leftovers for lunch the next day.

Black Bean & Tomato Quinoa

Ingredients
2 tsp grated lime zest
juice from 1-2 limes* 
(*depending on size & how tangy you want the dish. I  typically use 2 small limes)
2 tbsp butter, melted and cooled
1 tbsp olive oil
1 tsp sugar
1 cup quinoa (uncooked)
1 can black beans, rinsed and drained
1 pint cherry tomatoes, halved
1 bunch of green onions, chopped
1 bunch fresh cilantro, chopped

Directions
Dressing: 
Whisk together lime zest and juice, butter, oil, sugar, and s&p in a large bowl.

Quinoa:
Stir 2 cups water + 1 cup quinoa in a pot & bring to a boil. Let boil for 10 minutes.
Partially cover and reduce to a simmer for 10 minutes until water is mostly absorbed. 
Remove from heat, put a paper-towel between the pot and the lid, and let sit for 10 minutes.

Add quinoa to dressing and toss until dressing is absorbed.
Then stir in remaining ingredients (beans, tomatoes, onions, and cilantro) and s&p to taste.

Wednesday, April 9, 2014

On The Menu: Quinoa & Veggie Stuffed Peppers

Stuffed Peppers are one of my favorite meals. They do take a little bit of time to make, but when they're done they're a hearty and filling meal. They also make awesome lunch leftovers.

Until last week, we had two favorite stuffed pepper recipes that we rotated between: the classic ground beef & rice stuffed pepper, and then a slightly healthier (and fancier!) ground turkey, feta, and quinoa stuffed pepper. Both are delicious. Now we have three favorite recipes.

Last week we tried (and loved): Quinoa & Veggie Stuffed Peppers.

Man oh man these are good. Oh and did I mention that they're only 260 calories each?

Quinoa & Veggie Stuffed Peppers | Joie de Vivre

The original recipe can be found here. I modified things a little bit - as usual!

Ingredients
1 tablespoon extra-virgin olive oil
1 red onion, chopped
1/2 pound sliced mushrooms
1 cup chopped carrots
7 bell peppers 
(1 cored, seeded and chopped; tops removed from remaining 6 then cored and seeded)
1/2 cup chopped parsley
1/4 pound baby spinach
1 1/2 teaspoon ground cinnamon
3/4 teaspoon ground cumin
1 cup uncooked quinoa
S&P
1/2 cup roasted cashews

Directions
Preheat the oven to 350°F. 

Cook the quinoa according to package directions. 
(You can work on this while you're making the stuffing)

(I used half white quinoa and half red quinoa - so pretty!)


Heat oil in a large skillet over medium high heat. 
Add onion and peppers and cook, stirring occasionally until transparent.


Meanwhile, bring a large pot of water to boil. 
Submerge the (cored & tops removed) peppers for 2 minutes.


Let them sit in a glass pyrex dish while you continue making the stuffing.


Add carrots and then mushrooms to the onions & peppers, and cook until softened.

(Time saver - buy pre-chopped carrots!)


 Add parsley and spinach.


Let spinach wilt then stir in cinnamon, cumin and cooked quinoa and toss gently to combine. 

(Side note: cinnamon & cumin seemed crazy to me when I read the recipe - believe me, they are an awesome addition! Just do it! Your taste buds will thank you.)

Add salt, pepper and cashews and cook 1 to 2 minutes more. 

Divide quinoa mixture evenly among remaining 6 bell peppers, gently packing it down and making sure to fully fill each pepper. Top each pepper with a little bit of cheese. Because cheese makes everything better. Bake for about 30 minutes.

When they're done, eat and enjoy! 
And if you're hungry enough for a second pepper, go for it and don't even feel bad about it!


Wednesday, April 2, 2014

On The Menu: Carrot {Juicer} Muffins

Our juicer has been getting a workout lately! Taylor has been juicing up a storm & we've tried a plethora of juice recipes. My favorite juices tend to be "morning" juices - lots of carrots, apples, and oranges (and not very much celery, cucumber, or kale!).

One very common byproduct of juicing so often: leftover pulp! You can apparently do many things with leftover juice pulp: fertilize a garden, add it to a compost pile, feed chickens, etc. Since we live in a very small condo, in the middle of a city, without a backyard, we typically end up just throwing out the pulp anytime we juice.

Anyway, after a few weeks of throwing away veggie remains, I got the idea to search for a muffin recipe where I could actually use some of the pulp instead of throwing it away every time. Behold: carrot muffins!


I found the recipe on Pinterest here but made a few modifications. Here's my version of the recipe:

Carrot Muffins
(Typically makes about 18 muffins)

Ingredients:
2 cups all-purpose flour
2 teaspoons baking soda
1/4 cup ground flax seeds
Pinch of chia seeds
2 teaspoons cinnamon
1/4 teaspoon salt
1 cup sugar
3-5 cups of "shredded veggies"
(ie carrot pulp or apple pulp or anything you want to put into your muffins)
1/2 cup pecans (or any other nuts you have on hand: almonds, pistachios, etc.)
3 large eggs
1 cup vegetable
2 teaspoons vanilla
A sprinkle of oats for decorating

Preparation:
Preheat oven to 350°F and prep your muffin tin.
(Use pretty muffin cups so you smile every time you see one of the muffins)
Into a large bowl mix together flour, baking soda, flax, chia, cinnamon, and salt and whisk in sugar. 
Coarsely chop the nuts. 
Add carrot pulp and nuts to flour mixture and toss well.
In another bowl, whisk together eggs, oil, and vanilla. 
Add add to flour mixture, stirring until batter is just combined well.
Divide batter among muffin cups, filling them three fourths full.
Sprinkle on some oats as garnish.
Bake until puffed, 15 to 20 minutes.

The muffins are dense, filling, and healthy (at least I'd like to believe they are healthy!). I try to add in whatever I can to make them full of good ingredients - more nuts, dried fruit, etc. I want to try using apple sauce instead of so much sugar next time I make them. 

Typically I make a batch on the weekend and then we have them as breakfast or as a snack during the week (I consider 1 muffin a serving & we wouldn't have a muffin for breakfast and for a snack in the same day!).

In terms of storage, I put the entire batch into a gallon ziplock (after they've cooled) and keep them in the pantry for a few days and then move them to the fridge. We typically eat them in about 2 weeks - they were a little dry towards the end but still good!

My favorite way to have them for breakfast is to heat one up in the microwave for a few seconds, cut it into quarters, and then spread a little bit of peanut butter on each quarter. Yum!

Tuesday, April 1, 2014

On The Menu: Southwestern Chicken Salad

Last night we tried a new recipe for dinner: Southwestern Chicken Salad. This was originally a lunch recipe, but we made enough for 2 dinners and 2 lunches. The leftovers were awesome today!

Southwestern Chicken Salad | Joie de Vivre

It was healthy, fast to prepare and delicious!

I just love rotisserie chicken - talk about an easy ingredient!

Oh and did I mention that there practically isn't any clean up? We literally made the salads straight into bowls & tupperware containers for work.


We were a little rebellious and added in tomatoes and sprouts. We also used mixed greens in addition to just romaine. That's kind of what I love about salads - you can add whatever you love and the salad only gets better!


Our only downfall was the dressing. I followed the recipe almost exactly but felt like the lime flavor was too tart and the overall consistency was a little too thick. I think we'd definitely make this salad again, but in the future I'll probably plan to look up a few dressing recipes and see if I can make modifications.

Southwestern Chicken Salad
(Makes 2 servings) 

Ingredients:
6 cups romaine lettuce, chopped
1 cup rotisserie chicken, shredded
1 red bell pepper, sliced
1/2 cup canned black beans
1/3 cup greek yogurt
3 tbsp lime juice
1/4 tsp chili powder
salt & pepper 

Directions:
Divide the lettuce, chicken, bell pepper and beans into two dishes.
In a small bowl, whisk together: yogurt, lime juice, chili powder, and s&p.
Top salad with dressing.
Optional: add tomatoes, sprouts, or any other salad toppings you love!

Recipe courtesy of Robin Long & Drew Parisi!

Tuesday, March 6, 2012

On The Menu: Boeuf Bourguignon a la Julia Child

Taylor and I recently decided that we have a new mission in life.
A food mission.
Or, more specifically:
A cooking mission.

We love to cook.
In fact, we make dinner at home together just about every night.
We love it.

Little factoid you may not know?
Taylor is a mean chopping machine.
Set a stack of veggies in front of him, and in just minutes, everything will be perfectly chopped and set into size-appropriate prep bowls.

We consider ourselves pretty good cooks.
We have a good handle on all the "classic" stuff:
 chicken, fish, beef, soups, salads, pasta, sandwiches, etc.

We started branching out lately with slightly more complicated dishes like
brown-rice mushroom risotto
and
homemade chicken pot pie
and
restaurant-style pan-seared steak.

Mmmmm.

Our goal is to get really good at cooking well.
Not a bad mission, huh?

And so, a few weeks ago, we made a big purchase.
Julia Child's "Mastering the Art of French Cooking"


First recipe we wanted to try?
Boeuf Bourguignon.
Beef stew a la delicious.

I followed the recipe as well as I could.
But I did improvise a little.

I love Julia's intro to the recipe: "As is the case with most famous dishes, there are more ways than one to arrive at a good boeuf bourguignon. Carefully done, and perfectly flavored, it is certainly one of the most delicious beef dished concocted by man."

Alright Julila, it's on!

The Ingredients
6 oz. bacon
[we used about 4 pieces of thick bacon]
1 tbsp olive oil
3 lbs of stewing beef (cut into 2-inch pieces)
1 sliced carrot
[I would double (or even triple) this next time]
1 sliced onion
salt & pepper
2 tbsp flour
3 cups red wine
2-3 cups beef stock
1 tbsp tomato paste
2 cloves minced garlic
1 crumbled bay leaf
1/2 tsp thyme

Directions
Start by prepping everything.
 I didn't and was running around like a crazy person trying to chop things while others cooked.
Also, pre-heat the oven to 450.

Chop the bacon into slices
[The recipe talks about lardons and doing something complicated to the rind.
I opted for just chopping the bacon the way it was]

Prep the meat - cut into two-inch pieces.
The recipe calls for lean meat, so we cut out as much fat as we could.

And prep the veggies.
Our onion to carrot ratio was clearly a little off.
(Like I said before, next time I'd use 2 or 3 carrots)


Heat the oil in an over-proof casserole dish.
Add the bacon and saute until crispy.
Take the bacon out with a slotted spoon.
[Sample bacon]
Keep the oil in the casserole - you'll use it in the next step!

Using a paper towel, dry off each piece of meat.
This will help the meat brown properly!
(Julia was totally on to something with this!)

Next, saute the meat, a few pieces at a time,
 in the oil and bacon fat until "nicely browned on all sides," and then set aside.
[The cookbook said to let the oil/fat get very hot 
before doing this ("until almost smoking," they said).
I didn't follow that direction very closely, 
and so my meat only slightly browned and instead just cooked a little.]


In the same fat, brown the veggies.
[Or in our case, brown the (mass quantity of) onions and carrot pieces!]
Then drain the oil.

Return the beef and bacon to the pan and toss with salt & pepper.

Sprinkle on the flour and toss to coat the beef.

Set the casserole, uncovered, in the oven for 4 minutes.
Take it out, toss the meat, and then put it back in for 4 more minutes.
(This will brown the flour and coat the beef with a light crust.)
Take the casserole out, and turn the oven down to 325.

Stir in the wine and enough stock so the beef is barely covered.
[I missed the barely part - I clearly went for fully covered instead!]
Add the tomato paste, garlic, and herbs.
Bring to a simmer on the stove.
Then cover the casserole, set it in the oven, and let it simmer for 2 1/2-3 hours.


During the 2 1/2 to 3 hour wait, you have plenty of time to cook the onions and mushrooms.
These aren't just any old onions and mushrooms. These are:

"Oignons Glaces A Brun"
and 
"Champignons Sautes au Beurre"

We're knee-deep in fancy french cooking here!

So the onions and mushrooms are technically an optional part of Boeuf Bourguignon
 (they even have their own recipes) 
But they really add to the stew so I totally recommend making them.

Champignons Sautes au Beurre
(Sauteed Mushrooms)
Ingredients
1/2 lb mushrooms
2 tbsp butter
1 tbsp oil
Directions
Heat the butter and oil.
Add the mushrooms (make sure they're well dried!)
Toss and shake the pan for 4-5 mins.
Remove from heat.
Try a mushroom.
And do a little dance.

Have you ever seen the movie Julia & Julia
This is part where Julie (the writer) repeats over and over: "don't crowd the mushrooms!"
I said that to myself many times as I was cooking them!
According to Julia (the chef), "successfully sauteed mushrooms are lightly browned and exude none of their juice while being cooked. To achieve this, the mushrooms must be dry and the butter very hot. And the mushrooms must not be crowded in the pan. If you saute too many at once, they steam rather than fry and their juices escape and they do not brown."
Whoa whoa whoa.
This is life changing stuff yall.
She is totally right!


You may have an urge to repeat the last two steps:
Try a mushroom.
And do a little dance.

Now that your world has been rocked, lets move on to the onions.

Onions Glaces a Brun 
(Brown-Braised Onions)
Ingredients
18-24 while pearl onions
1 1/2 tbsp butter
1 1/2 tbsp oil
1/2 cup brown stock
salt & pepper
herbs (parsley, bay leaf, 1/4 tsp thyme)
Directions
Heat the butter and oil in a skillet.
Add the onions and saute over medium heat (about 10 mins).
Roll the onions in the pan so they will brown evenly.
Then pour in the stock, s&p, and herbs.
Cover and simmer slowly for 40-50 minutes
(the onions will be tender but retain their shape - the liquid will have evaporated)
Remove from heat.

Now, back to our Boeuf.
When the meat is tender,
[and believe you me, after 3 hours, it will be wonderfully tender]
 pour the contents of the casserole through a strainer set over a sauce-pan.
[The recipe calls for a "metal sieve" - we used a plastic pasta strainer and it worked just fine]
Wash out the casserole and return the beef and bacon to it.
[Genius step btw - presentation is everything! Who wants to serve dinner in a crusty pot!?]
Distribute the onions and mushrooms over the beef.
[Swoon a little]


Now simmer the sauce for a minute or two, skimming the fat off the top.
You'll end up with about 2 1/2 cups of sauce.
Taste, and season if needed.
When it's slightly thickened, pour the sauce over the meat and vegetables.

[At this point you'll want to bring out your best china dishes
 because you'll realize that this ain't no ordinary meal.]

Serve with potatoes and a green veggie.
(It would also be delicious over noodles)

Next, take a minute and be amazed that you just made boeuf bourguignon.

Now sadly, I have to admit that Taylor and I were so focused on sitting down and trying our delicious creation, that we totally forgot to take a picture of it!

I searched online until I found something that looked slightly similar to ours!
(I just couldn't leave you hanging after all that, could I!?)

This dish was, without a doubt, the most impressive meal we've made to date.
It does take all day to make, and it is, really, just beef stew.
But it absolutely rocks.

Image/Via

Friday, February 24, 2012

Ham and Cheese Waffles

This past weekend Taylor and I had a breakfast breakthrough.

Ham and cheese waffles.

Oh yes.

Should I say that agian?

Wonderfully hammy, gooey cheddary cheesy, homemade-batter(y?) waffles.

Oh man.


Now if you know me you know that I absolutely LOVE breakfast.
I make an egg, toast, and tea just about every single morning.
Some weekends we go a little crazy and make omelets.
And sometimes we mix it up and make pancakes (from a mix).

This weekend we made ham and cheese waffles.
And they pretty much changed our lives.

We're big on Bon Appetit magazine.
We devour it as soon as it comes in the mail.
[yes, pun intended!]

We received the latest issue this weekend and found this [amazing] recipe on one of the first pages.
The picture above made me want to eat the page.
I resisted because that would be a little crazy, but the ingredients quickly made it onto our grocery list for the week.

This is what you'll need to make this.
And trust me, you want to make this.

Ingredients

  • 1 3/4 cups flour
  • 1 tablespoon sugar
  • 2 teaspoons baking powder
  • 1 teaspoon baking soda
  • 1 teaspoon kosher salt
  • 3 large egg whites
  • 3 large egg yolks
  • 1 cup (2 sticks) melted butter
  • 1 cup buttermilk
  • 3/4 cup soda water
  • Non-stick vegetable oil spray
  • 1 cup thinly-cut strips of ham
  • 3/4 cup shredded sharp white cheddar
  • Maple syrup
  • Special Equipment

    Waffle maker

    Haha. Yes, you need a waffle maker, believe it or not!
    [That really made me laugh the first time I read it]

    We halved the recipe because honestly, the idea of 2 sticks of butter
     for breakfast kind of freaked me out.
    And half was way more than enough for two people.
    We ended up with leftover waffles.
    They make a perfect snack.

    Preparation

    • Preheat oven to 300°. Heat waffle iron until very hot. Whisk flour, sugar, baking powder, baking soda, and kosher salt in a large bowl. Using an electric mixer, beat egg whites in a medium bowl until medium-soft peaks form. Whisk egg yolks, melted butter, buttermilk, and soda water in a medium bowl; gradually whisk into dry ingredients. Fold in egg whites.
    • Coat waffle iron with non-stick vegetable oil spray. Pour batter onto iron, spreading it into corners (amount of batter needed will vary according to machine). Scatter 1 rounded Tbsp. ham and 1 Tbsp. white cheddar over each waffle. Cook until golden brown and cooked through. Transfer to a baking sheet; keep waffles warm in oven between batches. Serve with butter and warm maple syrup.


    My only suggestion is to let the butter cool a little bit and make
    sure the buttermilk and soda water aren't too cold.
    We combined (rather) warm butter and cold liquids a bit too quickly and the butter partially re-solidified.

    We went out and splurged on 100% pure maple syrup and it made all the difference.

    Yum
    Yum
    Yum
    This is without a doubt my favorite weekend breakfast recipe ever.
    Well done, Bon Appetit, well done.

    Recipe found here

Tuesday, February 21, 2012

Candied Orange Peels

My plan for President's Day weekend was to try a new cookie recipe:
chocolate chip, pistachio, candied-orange cookies.
Mmmmm.

Taylor and I searched high and low but could not find candied orange peels anywhere in Dallas.
We tried Whole Foods and Central Market.
We asked in Tom Thumb and Kroger.
And we even looked up specialty food stores.

Apparently candied orange peels are a seasonal item.
Who knew?

Well you can't very well make 
chocolate chip, pistachio, candied-orange cookies 
without the candied orange peel.

So I decided to make it myself.
And just in case you are ever in need of candied orange peel, I thought I would share the recipe.

Ingredients:
A navel orange (or two or three)
Water
Sugar

Start by cutting the orange into quarters.


Cut off a small part of each end.
Then peel out the orange.


Chop the peel into long, thin slices.


Meet Mr. Peel.


Next, bring a pot of water to a boil.
While you're waiting, measure out 1/2 cup water and 3/4 cup sugar (this will be used after the next step).
Drop the peels into the boiling water and let them blanch for 1 minute.
Strain the peels and rinse them with cool water.


Pour your 1/2 cup water into the empty pot and let it heat up.
Stir in the sugar and mix until dissolved.
Turn heat to medium-low and put in the orange peels.


Simmer for 15 minutes.


Line a baking sheet with parchment paper.
Using tongs, take out the peels and lay them on the paper.


Take lots of pictures because, believe me, you'll be impressed 
that you're making candied orange peels!


Take a picture from a different point of view to switch things up a little.


The peels need a few many hours to completely dry.
At this point you can do three things:
1. Let them dry and have plain candied orange peels
2. Sprinkle (or roll) them in sugar for very sweet orange peels
3. Let them dry a little and then dip them in chocolate for chocolate orange peels


I lightly sprinkled mine with sugar since they're going into cookies next.


And voila! Candied orange peels.


Stay tuned for the outcome of the chocolate chip, pistachio, candied-orange cookies!
Showing posts with label Recipe. Show all posts

Tuesday, June 9, 2015

Quinoa Recipes Galore

We tried two new quinoa recipes recently and they were both phenomenal!

First up: Grilled Corn and Quinoa Salad.
Oh man.
This is so summery.
And oh so good.

It takes a little bit of time to chop up all the veggies, but trust me, it's worth it. This could totally be a side dish but we had it as our main meal with a side of grilled zucchini. It makes wonderful lunch leftovers. The original recipe calls for 2 cups of quinoa, which is what we made, but it seemed like wayyy too much when it was done cooking so I took out 1 cooked cup and saved it to make quinoa pancakes the next day.


Grilled Corn and Quinoa Salad
(Adapted from this recipe)


Ingredients
5 ears of corn, grilled
1 bunch green onions, chopped
1.5-2 cups quinoa
1 pint cherry tomatoes, chopped
1 bunch cilantro, chopped
Juice of 3 limes 
2 tbsp olive oil
S&P to taste

Directions
Prep & grill the corn (we just toss ears in a ziplock bag with evoo and s&p). 
When done, cut the kernels off the cobs.

Cook the quinoa.

Chop yo veggies.

Toss all ingredients together and voila!

Next up: Quinoa Pancakes.

I might just be in love with these.
I had them for the first time a few weeks ago for brunch at one of my favorite restaurants, True Food Kitchen. I knew then and there that I had to try to make them myself.

Surprisingly enough, they are way easier than you'd think!


Quinoa Pancakes
(Adapted from this recipe)

Ingredients
1 cup cooked quinoa
3/4 cup all-purpose flour
2 tsp baking powder
1/2 tsp salt
1 large egg
1 egg white
1 tbsp EVOO
1/4 cup milk
2 tbsp maple syrup (the good kind)

Directions
In a medium bowl, mix quinoa, flour, baking powder, and salt. 

In a small bowl, whisk together egg, egg white, evoo, milk, and syrup.

Add egg mixture to flour mixture and stir.

Heat your griddle or pan.
Make pancakes the way you normally do.

Serve with butter, maple syrup, some fresh berries, and my personal favorite: a dollop of plain Greek yogurt. Yes, seriously. Try it! I was totally skeptical the first time I tried it but it gives the pancakes a light taste and just the perfect tang to compliment the maple syrup.

I'm hooked, yall. 

Friday, March 13, 2015

On The Menu: Black Bean & Tomato Quinoa

Black Bean & Tomato Quinoa | On the Menu | Joie de Vivre

I cannot get enough of this salad lately.
It's light, easy to make, and packed with filling protein.
Quinoa + black beans for the win!

Oh and did I mention that it practically doesn't have a scent? That's especially appealing to this pregnant person.

Over the past two months I learned that strong-smelling foods were my enemy. I'd get 15 minutes into preparing a meal and the smell would be so overwhelming that I couldn't finish cooking! Food and smell aversions are no joke, people. It actually became pretty comical by the middle of the first trimester: we'd meal plan at the beginning of the week and then realize by Thursday that all the meals had been total failures because I couldn't handle the smells.

So we turned to a lot of cold dishes. It was the only way to make sure that my sweet husband didn't end up eating cold cereal again for dinner. Or toast. We've been eating a lot of toast lately.

Anyway, we found this recipe about 4-5 years on Epicurious and absolutely love it. In the past, we typically made it as a side to this Fish Taco recipe - which is amazing - totally recommend it. Both recipes have cilantro & onion and just go so well together.

However, fish tacos have been out lately, for obvious smelly reasons. So we've been making this salad solo, or as a side to grilled (outside) chicken. And it always seems to make enough to have fabulous leftovers for lunch the next day.

Black Bean & Tomato Quinoa

Ingredients
2 tsp grated lime zest
juice from 1-2 limes* 
(*depending on size & how tangy you want the dish. I  typically use 2 small limes)
2 tbsp butter, melted and cooled
1 tbsp olive oil
1 tsp sugar
1 cup quinoa (uncooked)
1 can black beans, rinsed and drained
1 pint cherry tomatoes, halved
1 bunch of green onions, chopped
1 bunch fresh cilantro, chopped

Directions
Dressing: 
Whisk together lime zest and juice, butter, oil, sugar, and s&p in a large bowl.

Quinoa:
Stir 2 cups water + 1 cup quinoa in a pot & bring to a boil. Let boil for 10 minutes.
Partially cover and reduce to a simmer for 10 minutes until water is mostly absorbed. 
Remove from heat, put a paper-towel between the pot and the lid, and let sit for 10 minutes.

Add quinoa to dressing and toss until dressing is absorbed.
Then stir in remaining ingredients (beans, tomatoes, onions, and cilantro) and s&p to taste.

Wednesday, April 9, 2014

On The Menu: Quinoa & Veggie Stuffed Peppers

Stuffed Peppers are one of my favorite meals. They do take a little bit of time to make, but when they're done they're a hearty and filling meal. They also make awesome lunch leftovers.

Until last week, we had two favorite stuffed pepper recipes that we rotated between: the classic ground beef & rice stuffed pepper, and then a slightly healthier (and fancier!) ground turkey, feta, and quinoa stuffed pepper. Both are delicious. Now we have three favorite recipes.

Last week we tried (and loved): Quinoa & Veggie Stuffed Peppers.

Man oh man these are good. Oh and did I mention that they're only 260 calories each?

Quinoa & Veggie Stuffed Peppers | Joie de Vivre

The original recipe can be found here. I modified things a little bit - as usual!

Ingredients
1 tablespoon extra-virgin olive oil
1 red onion, chopped
1/2 pound sliced mushrooms
1 cup chopped carrots
7 bell peppers 
(1 cored, seeded and chopped; tops removed from remaining 6 then cored and seeded)
1/2 cup chopped parsley
1/4 pound baby spinach
1 1/2 teaspoon ground cinnamon
3/4 teaspoon ground cumin
1 cup uncooked quinoa
S&P
1/2 cup roasted cashews

Directions
Preheat the oven to 350°F. 

Cook the quinoa according to package directions. 
(You can work on this while you're making the stuffing)

(I used half white quinoa and half red quinoa - so pretty!)


Heat oil in a large skillet over medium high heat. 
Add onion and peppers and cook, stirring occasionally until transparent.


Meanwhile, bring a large pot of water to boil. 
Submerge the (cored & tops removed) peppers for 2 minutes.


Let them sit in a glass pyrex dish while you continue making the stuffing.


Add carrots and then mushrooms to the onions & peppers, and cook until softened.

(Time saver - buy pre-chopped carrots!)


 Add parsley and spinach.


Let spinach wilt then stir in cinnamon, cumin and cooked quinoa and toss gently to combine. 

(Side note: cinnamon & cumin seemed crazy to me when I read the recipe - believe me, they are an awesome addition! Just do it! Your taste buds will thank you.)

Add salt, pepper and cashews and cook 1 to 2 minutes more. 

Divide quinoa mixture evenly among remaining 6 bell peppers, gently packing it down and making sure to fully fill each pepper. Top each pepper with a little bit of cheese. Because cheese makes everything better. Bake for about 30 minutes.

When they're done, eat and enjoy! 
And if you're hungry enough for a second pepper, go for it and don't even feel bad about it!


Wednesday, April 2, 2014

On The Menu: Carrot {Juicer} Muffins

Our juicer has been getting a workout lately! Taylor has been juicing up a storm & we've tried a plethora of juice recipes. My favorite juices tend to be "morning" juices - lots of carrots, apples, and oranges (and not very much celery, cucumber, or kale!).

One very common byproduct of juicing so often: leftover pulp! You can apparently do many things with leftover juice pulp: fertilize a garden, add it to a compost pile, feed chickens, etc. Since we live in a very small condo, in the middle of a city, without a backyard, we typically end up just throwing out the pulp anytime we juice.

Anyway, after a few weeks of throwing away veggie remains, I got the idea to search for a muffin recipe where I could actually use some of the pulp instead of throwing it away every time. Behold: carrot muffins!


I found the recipe on Pinterest here but made a few modifications. Here's my version of the recipe:

Carrot Muffins
(Typically makes about 18 muffins)

Ingredients:
2 cups all-purpose flour
2 teaspoons baking soda
1/4 cup ground flax seeds
Pinch of chia seeds
2 teaspoons cinnamon
1/4 teaspoon salt
1 cup sugar
3-5 cups of "shredded veggies"
(ie carrot pulp or apple pulp or anything you want to put into your muffins)
1/2 cup pecans (or any other nuts you have on hand: almonds, pistachios, etc.)
3 large eggs
1 cup vegetable
2 teaspoons vanilla
A sprinkle of oats for decorating

Preparation:
Preheat oven to 350°F and prep your muffin tin.
(Use pretty muffin cups so you smile every time you see one of the muffins)
Into a large bowl mix together flour, baking soda, flax, chia, cinnamon, and salt and whisk in sugar. 
Coarsely chop the nuts. 
Add carrot pulp and nuts to flour mixture and toss well.
In another bowl, whisk together eggs, oil, and vanilla. 
Add add to flour mixture, stirring until batter is just combined well.
Divide batter among muffin cups, filling them three fourths full.
Sprinkle on some oats as garnish.
Bake until puffed, 15 to 20 minutes.

The muffins are dense, filling, and healthy (at least I'd like to believe they are healthy!). I try to add in whatever I can to make them full of good ingredients - more nuts, dried fruit, etc. I want to try using apple sauce instead of so much sugar next time I make them. 

Typically I make a batch on the weekend and then we have them as breakfast or as a snack during the week (I consider 1 muffin a serving & we wouldn't have a muffin for breakfast and for a snack in the same day!).

In terms of storage, I put the entire batch into a gallon ziplock (after they've cooled) and keep them in the pantry for a few days and then move them to the fridge. We typically eat them in about 2 weeks - they were a little dry towards the end but still good!

My favorite way to have them for breakfast is to heat one up in the microwave for a few seconds, cut it into quarters, and then spread a little bit of peanut butter on each quarter. Yum!

Tuesday, April 1, 2014

On The Menu: Southwestern Chicken Salad

Last night we tried a new recipe for dinner: Southwestern Chicken Salad. This was originally a lunch recipe, but we made enough for 2 dinners and 2 lunches. The leftovers were awesome today!

Southwestern Chicken Salad | Joie de Vivre

It was healthy, fast to prepare and delicious!

I just love rotisserie chicken - talk about an easy ingredient!

Oh and did I mention that there practically isn't any clean up? We literally made the salads straight into bowls & tupperware containers for work.


We were a little rebellious and added in tomatoes and sprouts. We also used mixed greens in addition to just romaine. That's kind of what I love about salads - you can add whatever you love and the salad only gets better!


Our only downfall was the dressing. I followed the recipe almost exactly but felt like the lime flavor was too tart and the overall consistency was a little too thick. I think we'd definitely make this salad again, but in the future I'll probably plan to look up a few dressing recipes and see if I can make modifications.

Southwestern Chicken Salad
(Makes 2 servings) 

Ingredients:
6 cups romaine lettuce, chopped
1 cup rotisserie chicken, shredded
1 red bell pepper, sliced
1/2 cup canned black beans
1/3 cup greek yogurt
3 tbsp lime juice
1/4 tsp chili powder
salt & pepper 

Directions:
Divide the lettuce, chicken, bell pepper and beans into two dishes.
In a small bowl, whisk together: yogurt, lime juice, chili powder, and s&p.
Top salad with dressing.
Optional: add tomatoes, sprouts, or any other salad toppings you love!

Recipe courtesy of Robin Long & Drew Parisi!

Tuesday, March 6, 2012

On The Menu: Boeuf Bourguignon a la Julia Child

Taylor and I recently decided that we have a new mission in life.
A food mission.
Or, more specifically:
A cooking mission.

We love to cook.
In fact, we make dinner at home together just about every night.
We love it.

Little factoid you may not know?
Taylor is a mean chopping machine.
Set a stack of veggies in front of him, and in just minutes, everything will be perfectly chopped and set into size-appropriate prep bowls.

We consider ourselves pretty good cooks.
We have a good handle on all the "classic" stuff:
 chicken, fish, beef, soups, salads, pasta, sandwiches, etc.

We started branching out lately with slightly more complicated dishes like
brown-rice mushroom risotto
and
homemade chicken pot pie
and
restaurant-style pan-seared steak.

Mmmmm.

Our goal is to get really good at cooking well.
Not a bad mission, huh?

And so, a few weeks ago, we made a big purchase.
Julia Child's "Mastering the Art of French Cooking"


First recipe we wanted to try?
Boeuf Bourguignon.
Beef stew a la delicious.

I followed the recipe as well as I could.
But I did improvise a little.

I love Julia's intro to the recipe: "As is the case with most famous dishes, there are more ways than one to arrive at a good boeuf bourguignon. Carefully done, and perfectly flavored, it is certainly one of the most delicious beef dished concocted by man."

Alright Julila, it's on!

The Ingredients
6 oz. bacon
[we used about 4 pieces of thick bacon]
1 tbsp olive oil
3 lbs of stewing beef (cut into 2-inch pieces)
1 sliced carrot
[I would double (or even triple) this next time]
1 sliced onion
salt & pepper
2 tbsp flour
3 cups red wine
2-3 cups beef stock
1 tbsp tomato paste
2 cloves minced garlic
1 crumbled bay leaf
1/2 tsp thyme

Directions
Start by prepping everything.
 I didn't and was running around like a crazy person trying to chop things while others cooked.
Also, pre-heat the oven to 450.

Chop the bacon into slices
[The recipe talks about lardons and doing something complicated to the rind.
I opted for just chopping the bacon the way it was]

Prep the meat - cut into two-inch pieces.
The recipe calls for lean meat, so we cut out as much fat as we could.

And prep the veggies.
Our onion to carrot ratio was clearly a little off.
(Like I said before, next time I'd use 2 or 3 carrots)


Heat the oil in an over-proof casserole dish.
Add the bacon and saute until crispy.
Take the bacon out with a slotted spoon.
[Sample bacon]
Keep the oil in the casserole - you'll use it in the next step!

Using a paper towel, dry off each piece of meat.
This will help the meat brown properly!
(Julia was totally on to something with this!)

Next, saute the meat, a few pieces at a time,
 in the oil and bacon fat until "nicely browned on all sides," and then set aside.
[The cookbook said to let the oil/fat get very hot 
before doing this ("until almost smoking," they said).
I didn't follow that direction very closely, 
and so my meat only slightly browned and instead just cooked a little.]


In the same fat, brown the veggies.
[Or in our case, brown the (mass quantity of) onions and carrot pieces!]
Then drain the oil.

Return the beef and bacon to the pan and toss with salt & pepper.

Sprinkle on the flour and toss to coat the beef.

Set the casserole, uncovered, in the oven for 4 minutes.
Take it out, toss the meat, and then put it back in for 4 more minutes.
(This will brown the flour and coat the beef with a light crust.)
Take the casserole out, and turn the oven down to 325.

Stir in the wine and enough stock so the beef is barely covered.
[I missed the barely part - I clearly went for fully covered instead!]
Add the tomato paste, garlic, and herbs.
Bring to a simmer on the stove.
Then cover the casserole, set it in the oven, and let it simmer for 2 1/2-3 hours.


During the 2 1/2 to 3 hour wait, you have plenty of time to cook the onions and mushrooms.
These aren't just any old onions and mushrooms. These are:

"Oignons Glaces A Brun"
and 
"Champignons Sautes au Beurre"

We're knee-deep in fancy french cooking here!

So the onions and mushrooms are technically an optional part of Boeuf Bourguignon
 (they even have their own recipes) 
But they really add to the stew so I totally recommend making them.

Champignons Sautes au Beurre
(Sauteed Mushrooms)
Ingredients
1/2 lb mushrooms
2 tbsp butter
1 tbsp oil
Directions
Heat the butter and oil.
Add the mushrooms (make sure they're well dried!)
Toss and shake the pan for 4-5 mins.
Remove from heat.
Try a mushroom.
And do a little dance.

Have you ever seen the movie Julia & Julia
This is part where Julie (the writer) repeats over and over: "don't crowd the mushrooms!"
I said that to myself many times as I was cooking them!
According to Julia (the chef), "successfully sauteed mushrooms are lightly browned and exude none of their juice while being cooked. To achieve this, the mushrooms must be dry and the butter very hot. And the mushrooms must not be crowded in the pan. If you saute too many at once, they steam rather than fry and their juices escape and they do not brown."
Whoa whoa whoa.
This is life changing stuff yall.
She is totally right!


You may have an urge to repeat the last two steps:
Try a mushroom.
And do a little dance.

Now that your world has been rocked, lets move on to the onions.

Onions Glaces a Brun 
(Brown-Braised Onions)
Ingredients
18-24 while pearl onions
1 1/2 tbsp butter
1 1/2 tbsp oil
1/2 cup brown stock
salt & pepper
herbs (parsley, bay leaf, 1/4 tsp thyme)
Directions
Heat the butter and oil in a skillet.
Add the onions and saute over medium heat (about 10 mins).
Roll the onions in the pan so they will brown evenly.
Then pour in the stock, s&p, and herbs.
Cover and simmer slowly for 40-50 minutes
(the onions will be tender but retain their shape - the liquid will have evaporated)
Remove from heat.

Now, back to our Boeuf.
When the meat is tender,
[and believe you me, after 3 hours, it will be wonderfully tender]
 pour the contents of the casserole through a strainer set over a sauce-pan.
[The recipe calls for a "metal sieve" - we used a plastic pasta strainer and it worked just fine]
Wash out the casserole and return the beef and bacon to it.
[Genius step btw - presentation is everything! Who wants to serve dinner in a crusty pot!?]
Distribute the onions and mushrooms over the beef.
[Swoon a little]


Now simmer the sauce for a minute or two, skimming the fat off the top.
You'll end up with about 2 1/2 cups of sauce.
Taste, and season if needed.
When it's slightly thickened, pour the sauce over the meat and vegetables.

[At this point you'll want to bring out your best china dishes
 because you'll realize that this ain't no ordinary meal.]

Serve with potatoes and a green veggie.
(It would also be delicious over noodles)

Next, take a minute and be amazed that you just made boeuf bourguignon.

Now sadly, I have to admit that Taylor and I were so focused on sitting down and trying our delicious creation, that we totally forgot to take a picture of it!

I searched online until I found something that looked slightly similar to ours!
(I just couldn't leave you hanging after all that, could I!?)

This dish was, without a doubt, the most impressive meal we've made to date.
It does take all day to make, and it is, really, just beef stew.
But it absolutely rocks.
Image/Via

Friday, February 24, 2012

Ham and Cheese Waffles

This past weekend Taylor and I had a breakfast breakthrough.

Ham and cheese waffles.

Oh yes.

Should I say that agian?

Wonderfully hammy, gooey cheddary cheesy, homemade-batter(y?) waffles.

Oh man.


Now if you know me you know that I absolutely LOVE breakfast.
I make an egg, toast, and tea just about every single morning.
Some weekends we go a little crazy and make omelets.
And sometimes we mix it up and make pancakes (from a mix).

This weekend we made ham and cheese waffles.
And they pretty much changed our lives.

We're big on Bon Appetit magazine.
We devour it as soon as it comes in the mail.
[yes, pun intended!]

We received the latest issue this weekend and found this [amazing] recipe on one of the first pages.
The picture above made me want to eat the page.
I resisted because that would be a little crazy, but the ingredients quickly made it onto our grocery list for the week.

This is what you'll need to make this.
And trust me, you want to make this.

Ingredients

  • 1 3/4 cups flour
  • 1 tablespoon sugar
  • 2 teaspoons baking powder
  • 1 teaspoon baking soda
  • 1 teaspoon kosher salt
  • 3 large egg whites
  • 3 large egg yolks
  • 1 cup (2 sticks) melted butter
  • 1 cup buttermilk
  • 3/4 cup soda water
  • Non-stick vegetable oil spray
  • 1 cup thinly-cut strips of ham
  • 3/4 cup shredded sharp white cheddar
  • Maple syrup
  • Special Equipment

    Waffle maker

    Haha. Yes, you need a waffle maker, believe it or not!
    [That really made me laugh the first time I read it]

    We halved the recipe because honestly, the idea of 2 sticks of butter
     for breakfast kind of freaked me out.
    And half was way more than enough for two people.
    We ended up with leftover waffles.
    They make a perfect snack.

    Preparation

    • Preheat oven to 300°. Heat waffle iron until very hot. Whisk flour, sugar, baking powder, baking soda, and kosher salt in a large bowl. Using an electric mixer, beat egg whites in a medium bowl until medium-soft peaks form. Whisk egg yolks, melted butter, buttermilk, and soda water in a medium bowl; gradually whisk into dry ingredients. Fold in egg whites.
    • Coat waffle iron with non-stick vegetable oil spray. Pour batter onto iron, spreading it into corners (amount of batter needed will vary according to machine). Scatter 1 rounded Tbsp. ham and 1 Tbsp. white cheddar over each waffle. Cook until golden brown and cooked through. Transfer to a baking sheet; keep waffles warm in oven between batches. Serve with butter and warm maple syrup.


    My only suggestion is to let the butter cool a little bit and make
    sure the buttermilk and soda water aren't too cold.
    We combined (rather) warm butter and cold liquids a bit too quickly and the butter partially re-solidified.

    We went out and splurged on 100% pure maple syrup and it made all the difference.

    Yum
    Yum
    Yum
    This is without a doubt my favorite weekend breakfast recipe ever.
    Well done, Bon Appetit, well done.

    Recipe found here

Tuesday, February 21, 2012

Candied Orange Peels

My plan for President's Day weekend was to try a new cookie recipe:
chocolate chip, pistachio, candied-orange cookies.
Mmmmm.

Taylor and I searched high and low but could not find candied orange peels anywhere in Dallas.
We tried Whole Foods and Central Market.
We asked in Tom Thumb and Kroger.
And we even looked up specialty food stores.

Apparently candied orange peels are a seasonal item.
Who knew?

Well you can't very well make 
chocolate chip, pistachio, candied-orange cookies 
without the candied orange peel.

So I decided to make it myself.
And just in case you are ever in need of candied orange peel, I thought I would share the recipe.

Ingredients:
A navel orange (or two or three)
Water
Sugar

Start by cutting the orange into quarters.


Cut off a small part of each end.
Then peel out the orange.


Chop the peel into long, thin slices.


Meet Mr. Peel.


Next, bring a pot of water to a boil.
While you're waiting, measure out 1/2 cup water and 3/4 cup sugar (this will be used after the next step).
Drop the peels into the boiling water and let them blanch for 1 minute.
Strain the peels and rinse them with cool water.


Pour your 1/2 cup water into the empty pot and let it heat up.
Stir in the sugar and mix until dissolved.
Turn heat to medium-low and put in the orange peels.


Simmer for 15 minutes.


Line a baking sheet with parchment paper.
Using tongs, take out the peels and lay them on the paper.


Take lots of pictures because, believe me, you'll be impressed 
that you're making candied orange peels!


Take a picture from a different point of view to switch things up a little.


The peels need a few many hours to completely dry.
At this point you can do three things:
1. Let them dry and have plain candied orange peels
2. Sprinkle (or roll) them in sugar for very sweet orange peels
3. Let them dry a little and then dip them in chocolate for chocolate orange peels


I lightly sprinkled mine with sugar since they're going into cookies next.


And voila! Candied orange peels.


Stay tuned for the outcome of the chocolate chip, pistachio, candied-orange cookies!