A few months ago, I was faced with the dilemma of needing a large
quantity of thank yous that wouldn't break the bank.
This adorable little mason jar gift saved the day
and let me combine two of my loves (crafting and baking)!
Let's face it, pretty gifts are great but when there's an
edible component AND a reusable factor,
they're even better!
There are 3 parts to this craft
1. The lid
2. The decorations
3. The contents
Materials:
Mason jars
{with lids that come in two pieces}
Mod Podge
Scrapbook paper
{in patterns that make you happy}
Paint brush
Scissors
Pencil
Ribbon
Cookies
{or some other yummy/cute filling for your jar}
I found this large pack of pint-sized jars at Walmart for only about $15!
First, you want to work on the lids.
that describes how to perfectly cover your lids with scrapbook paper.
Covering the inner lid with paper is ingenious and SO cute!
It adds just the right amount of flair to make this gift something
that people will actually use again.
Two things to note with about the lids:
1. Once the lids are covered with paper, they fit a little more snugly in the ring.
You can still separate them if you try, but they almost turn into one piece.
2. I worked on all my lids before actually thinking about
the fact that I was going to fill the jars with cookies.
While the mode podge doesn't come into direct
contact with the contents (unless you turn the jar over, of course!),
I wasn't comfortable with putting edibles directly in the jar under a Mod Podged lid,
so I ended up putting the cookies into little bags.
The moral of this is to consider what you're putting inside the jars before Mod Podging!
Next, your want to work on the jar decorations.
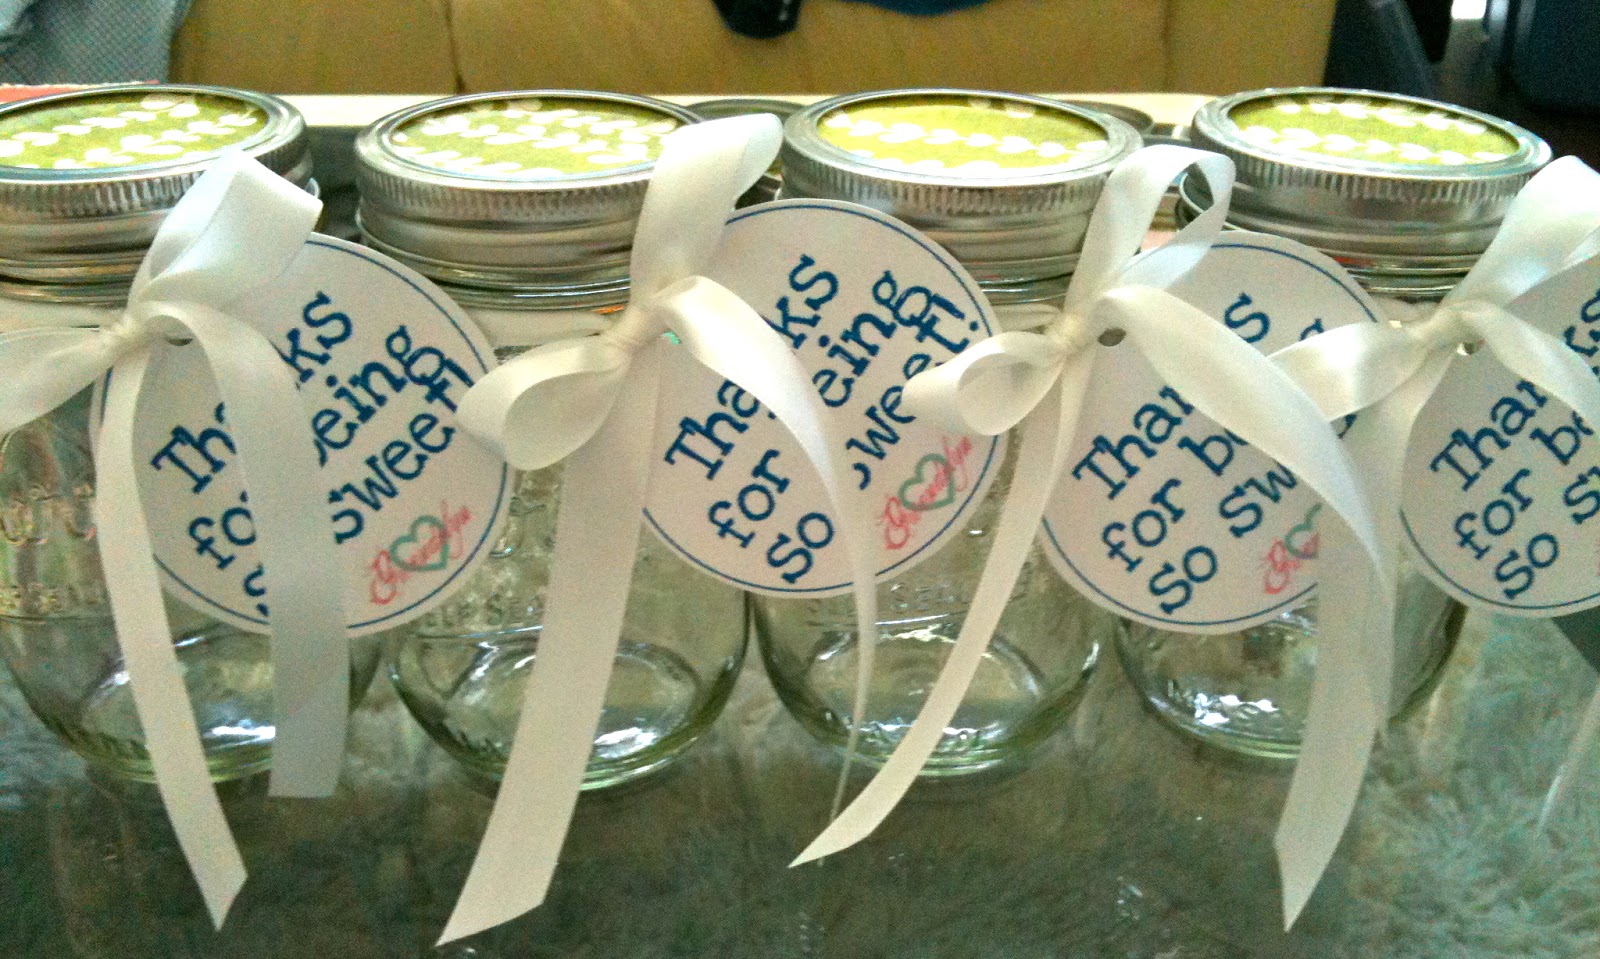
I decided to make little tags and tie them around the jar with white silky ribbon.
The tags looked cute from the front and gave me plenty of room on the back to write personalized notes.
I made the sheets in Word, and glued each sheet to poster board paper.
Then, cut out each circle, and punched a hole in the top of each
tag so I could thread the ribbon through.
Here are a few pictures of the finished jars before I added the cookies:
Next, I baked dozens of chocolate chip and snicker doodle cookies!
The hardest part was making them perfectly circular and small enough
to fit through the opening of the jar.
I stacked the cookies, put them into little cellophane bags, and tied a twist-tie around the top.
I set each little bag of cookies inside each jar...
...then put the lids on the jars, and they were finished!
And there you go!
Adorable little mason jar thank yous!
The best part about these gifts, besides the tasty little treat, is that you've also given the person a jar that can totally be reused for organizing buttons, beads, etc.!


